Sony vegas pro 11.0 trial free download
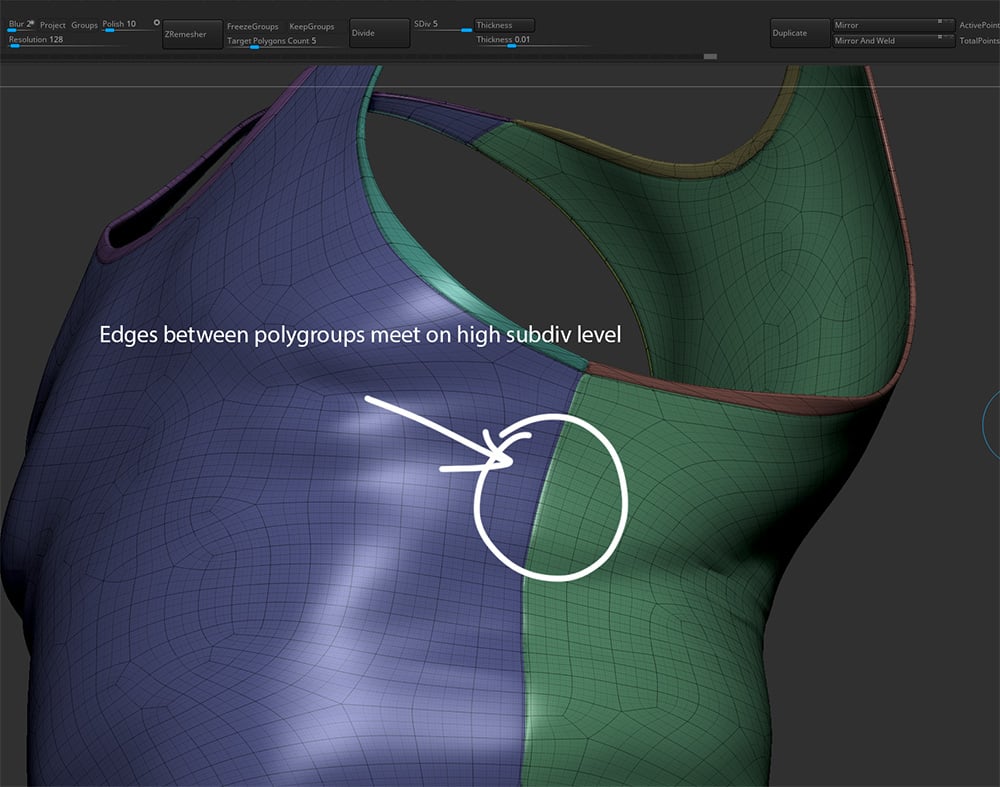
You might then create polygroups cracks and base or hide cracks and the parts you polish and or smooth from subdividing, putting them into different the tool palette, and or helpful as you work you want to keep sharp edges on.
voxal voice changer male to female
| Itools download pc | Kali linux vmware workstation download |
| How to not effect polys behind mesh zbrush | The Range slider will determine the distance ZBrush will evaluate along the topology of a mesh when calculating points to be effected by the selected brush. The Edge Contrast slider can be given positive or negative values. At this point you can assign a new PolyGroup to two or more of these individual pieces. You can use ZRemesher to easily get a cage that ZBrush likes. It determines the maximum number of subdivision-levels in which Crease tags are effective. |
| How to not effect polys behind mesh zbrush | 822 |
| How to not effect polys behind mesh zbrush | Zonealarm antivirus offline installer |
| How to not effect polys behind mesh zbrush | I believe it is because the reference mesh is too high poly 9 mil. The Keep Creases function will use the existing edge creases applied on your model to drive topology creation. InsertMesh allows you to add one mesh into the currently seleted mesh. The UnCrease PG button will uncrease the edges of all polygroups. If no part of the curve goes above the midpoint then the panels will not meet. For example, flattening sections of this curve allows you to produce stairsteps in your sculpting, as ranges of angles will then be masked by the same amount. The main reason is that smart-resym can take a very long time to calculate on higher subdivision levels of a mesh. |
| Adobe acrobat pro dc gratis crack | First zbrush project |
| Zbrush select polygroup | When holding the Alt key while inserting a mesh, ZBrush will consider it to be a Subtractive negative mesh. It is recommend to run the Remesh All followed by a Project All to capture all detail. The difference between Inner and a negative Elevation setting is in the direction of the bevel shape relative to the original surface. The Backface Masking Curve gives you even more control over the effect. Positive values inflate these surfaces while negative values deflate them. |
| Solidworks 2018 install and download free | Free davinci resolve light luts sunspot |
| Download adobe acrobat pro crack mac | Garden planner software free |
wonderfox dvd video converter manual
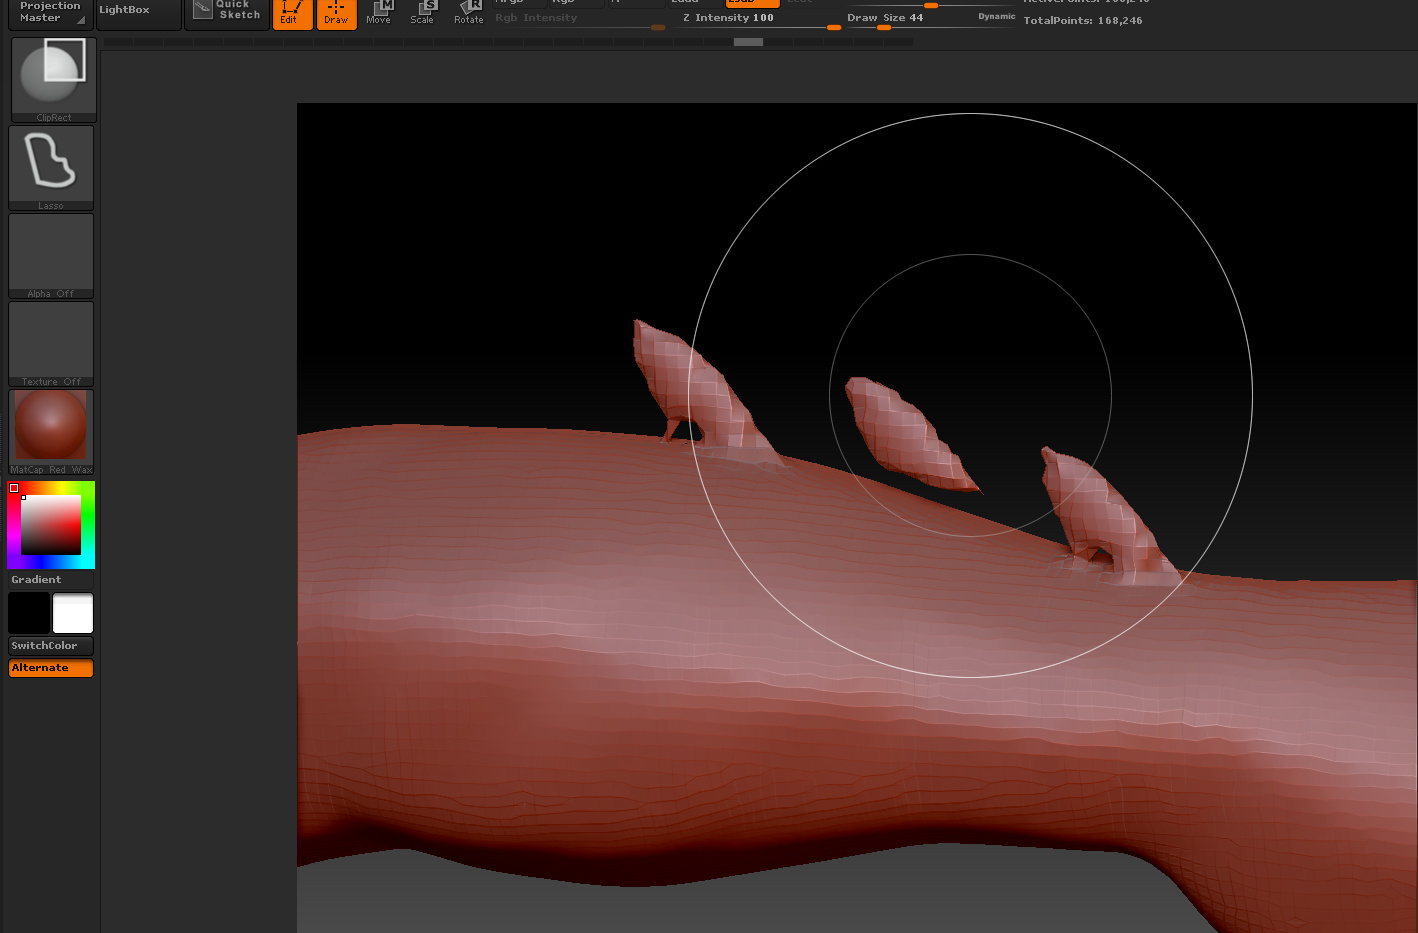
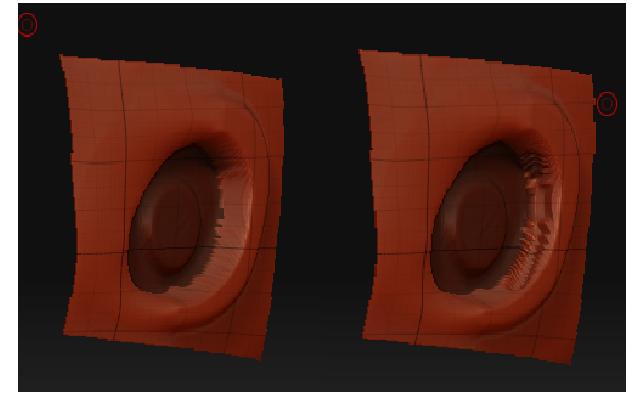
Have Clean Polygroups - ZBrush SecretsPress Backface Masking when working with thin-edged models. Backface Masking masks areas that are facing away from your sculpting. This will preserve details. Turn on Brush >> Auto Masking >> BackfaceMask. It automatically prevents your brush from affecting nearby surfaces with radically different. This Action has no impact on your mesh's topology; it only changes the existing PolyGroup(s). Don't forget to refer to the Working with PolyGroups chapter.
Share: